Exchange aliases being forwarded to external addresses
Forwarding aliases created in Exchange (O365) to External addresses
Exchange, also abbreviated as Microsoft Exchange is a service provided by Microsoft as In-house and hosted… etc. You may refer to this Wikipedia article which gives a broader explanation on the product line.
Since the beginning of the cloud computing era, all the services offered by various providers started to get faces in every possible way. Leaving that thought behind, at present most of the users feel more convenient using a cloud service with an affordable annual subscription than the traditional one time purchases. It is because of the perks that are given based on their services and products that are offered. For example, if you’re using an office suite cloud subscription, you’ll always get the latest releases/upgrades (from 2013 to 2016… etc) for free but not in offline/on-time purchase products (from 2013 and patches, updates… etc only). Well, you’ll get the updates for the package but not upgrades unless Microsoft wanted to. I’m pretty sure about this as I’ve seen these typo’s in Microsoft products regardless of their prices.
Now, I must confess that; Microsoft does offer an impressive service with their Office 365 product family. Especially, exchange and office suite packages regardless of what other users says. Of course, there are pros and cons in every product, doesn’t mean we don’t use them all. According to the factors that I have analyzed based on our business needs, Exchange weighted more than I have expected. I was once a google app fan but I have stepped into experiencing Exchange features. In fact, I have set-up many of our corporate domains.. etc which were very convenient for me configure with their given wizards and help lines. Google is better but Microsoft is a killer with its features such like ActiveSync, Yammer, Share point, Office suite, mailbox space… etc. Well! many will argue based on various factors but this ain’t the moment to do such. In Addition to that, an interesting fact I should raise as we have set-up two different domains with Exchange and its connectors to connect to external mail ex-changers allowing mails to pass through to our external mail server Google Apps (free edition given by Google earlier days). Works flawlessly with no issues as of now. Meanwhile, spare some time and have a look at this interesting case study of “Office365 vs Google Apps“.
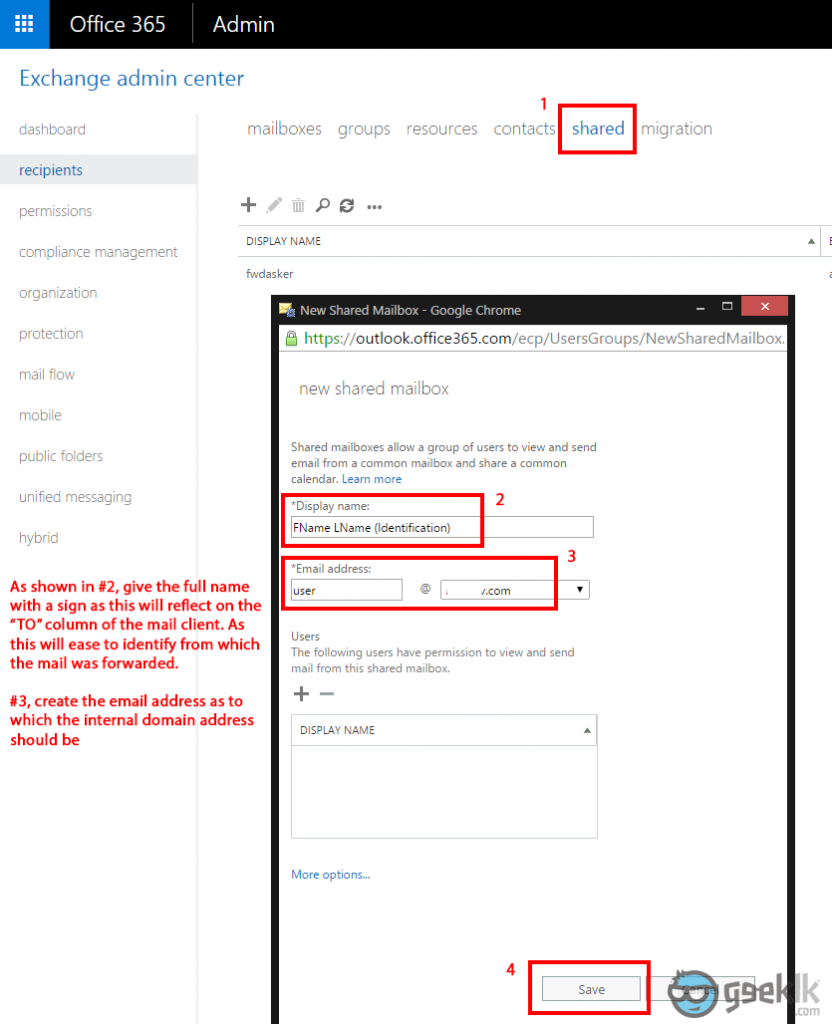
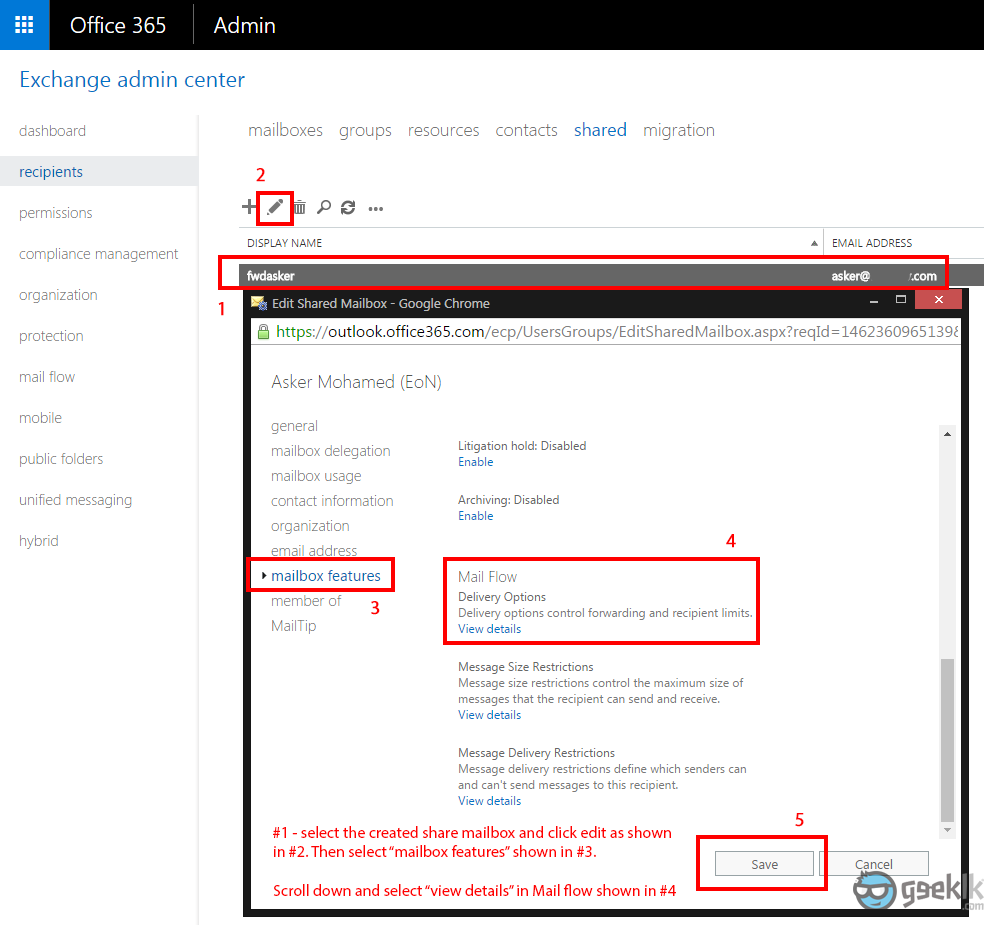
Since our corporate office planned to migrate POP mail accounts to Exchange by benefiting the Office suite subscriptions along, I wanted to just make sure I can do forwarding on the aliases that I create internally to external mails. This is very much required as we have users who will require their identities between required domains as an alias but not as a mail box. I was pretty sure we can over come this but I wanted to invest sometime and find out how it is done. After a few search over the net, I found out this post which explains in the most simpler way. However, I took a few more additional steps to go through and record them in pictures as I though; “What more convenient than looking through pictures to understand”.
Exchange alias forwarding (How-To)
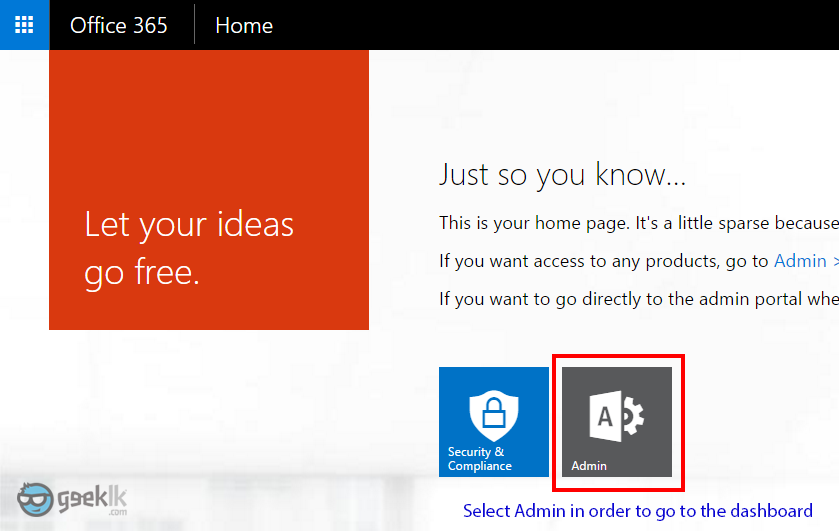
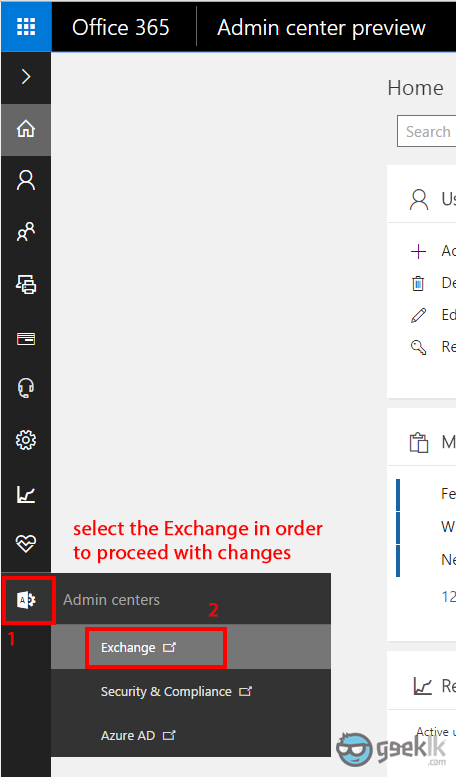
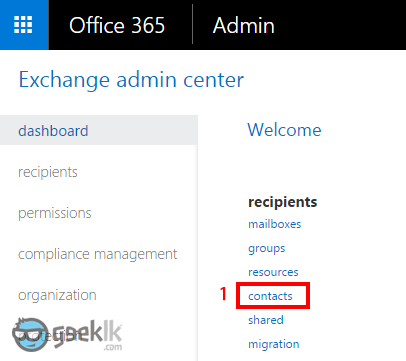
- As seen in the first picture, is an overview of the Exchange online admin portal where you’ll be produced with your available services. For here and now, select Admin in order for us to proceed with configuration. Then refer the second image for instruction which will take you to the page either with a pop-up or a new tab where you’ll need to select contacts under recipients noted as #1 (3rd image)
Refer below images for further explanations;
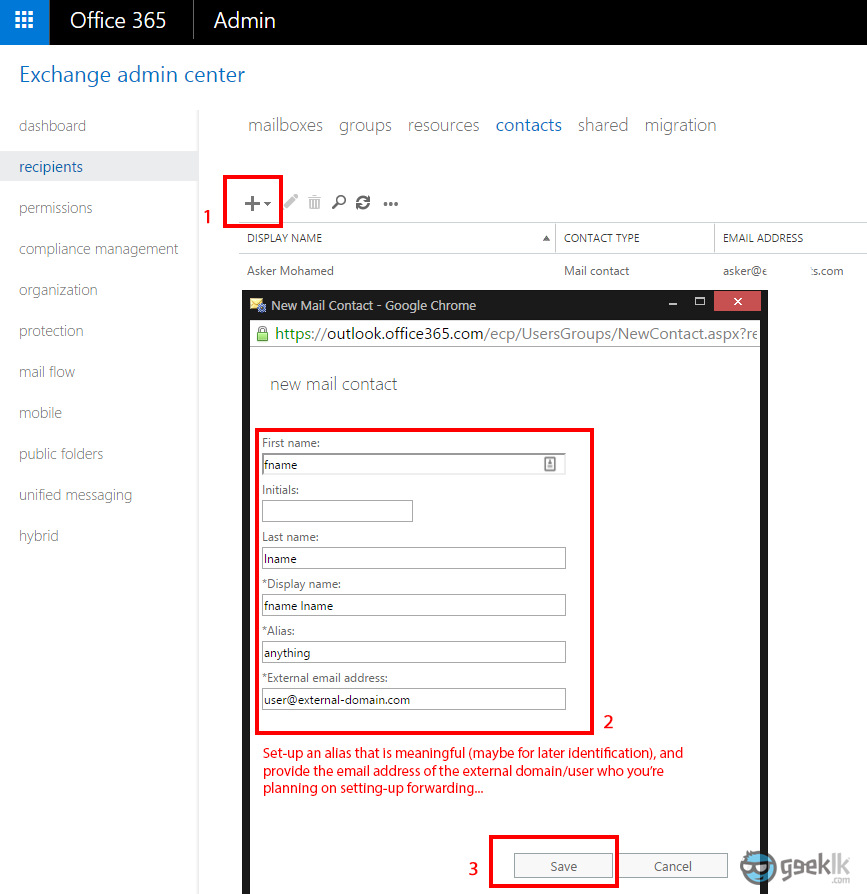
- Soon after selecting contacts as shown on the first set of slides, you’ll see the first picture that is shown in second slide. Select the “+” and select “mail contact” which will then display the pop-up window shown in the same image. Fill in information with external user’s email address along with an alias (not sure what that alias does though) and save the information. To avoid the added contact displaying, I have selected the tick “hide contact from appearing the global list” as I don’t want these users to be seen on GAL (Global Address List) list.
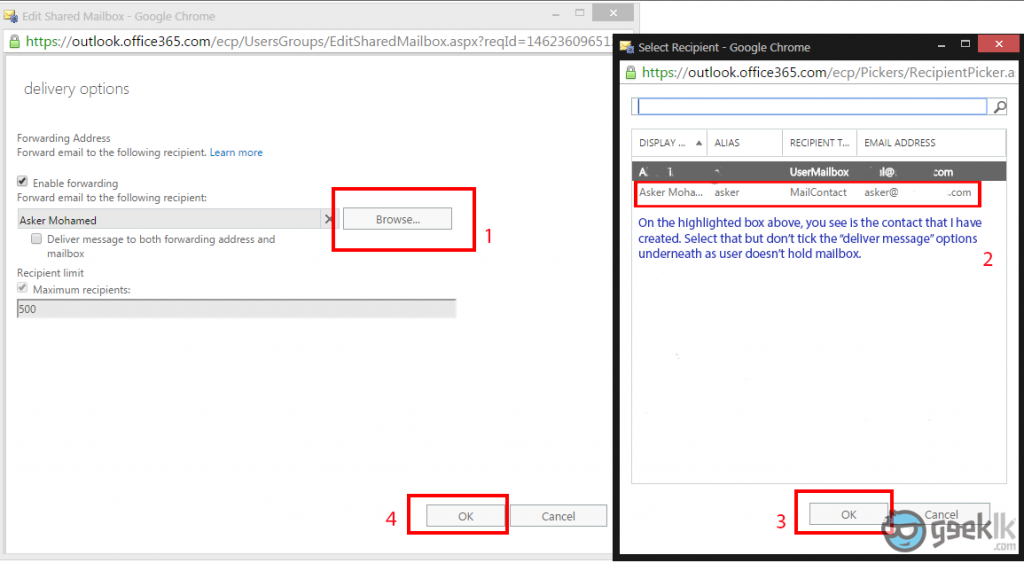
- Moving forward, read the instruction given on the 2nd image and move to the 3st image which has instructions with numbers placed. When you move to 4th and last image, select the user properly as you’ll see almost all the contacts. I have cleared them using editors to make it simpler.
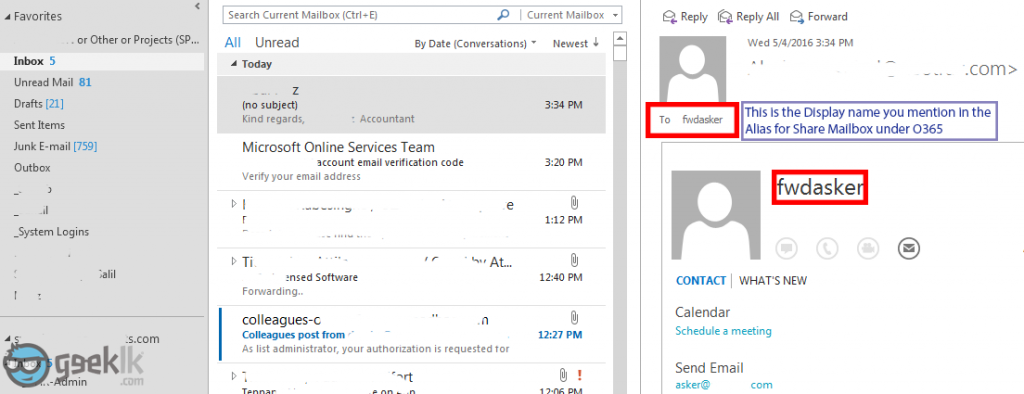
Once the above steps are done, you should receive mails as soon as someone send an email to the configured address. And the email will look like below;
I have created the mailbox mentioning “fwdasker” not knowing what exactly it will do. But now that I know this is the displayed name on the Outlook or any other mail side of view. Anhowy, I would like to thank the user who commented on the community with a simple explanation. I have just made more clearer with the picture and all just to get a complete idea of how it works and set-up.

