Setting up a captive portal with pfsense firewall
pfSense in is an open source firewall/router computer software distribution based on FreeBSD. It is one of the most powerful and most trusted open source firewall/routing software based on FreeBSD distribution with a custom kernel. pfSense offers various services such as VPN access, DDNS support, VPN with AD authentications, Web access and filtering and many others. You can refer to the various articles I have wrote about pfSense and I hope it helps you to learn a thing or two. One of the interesting features I recently tested and liked is the Captive portal. In fact the team has put an effort to bring a sleek design to with their recent 2.4.4 release.
Exploring and Setting up of Captive Portal
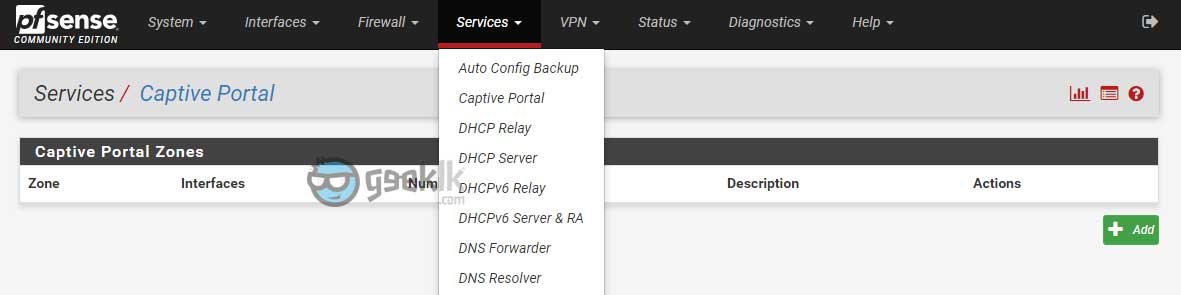
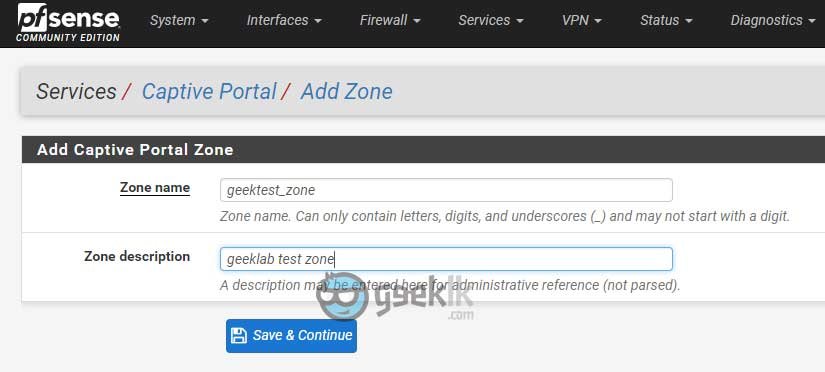
Once the firewall setup is successful, simply navigate to Services -> Captive portal to start the setup. Upon navigation, click on Add which will prompt to create a zone and present you with further setting up of captive portal.
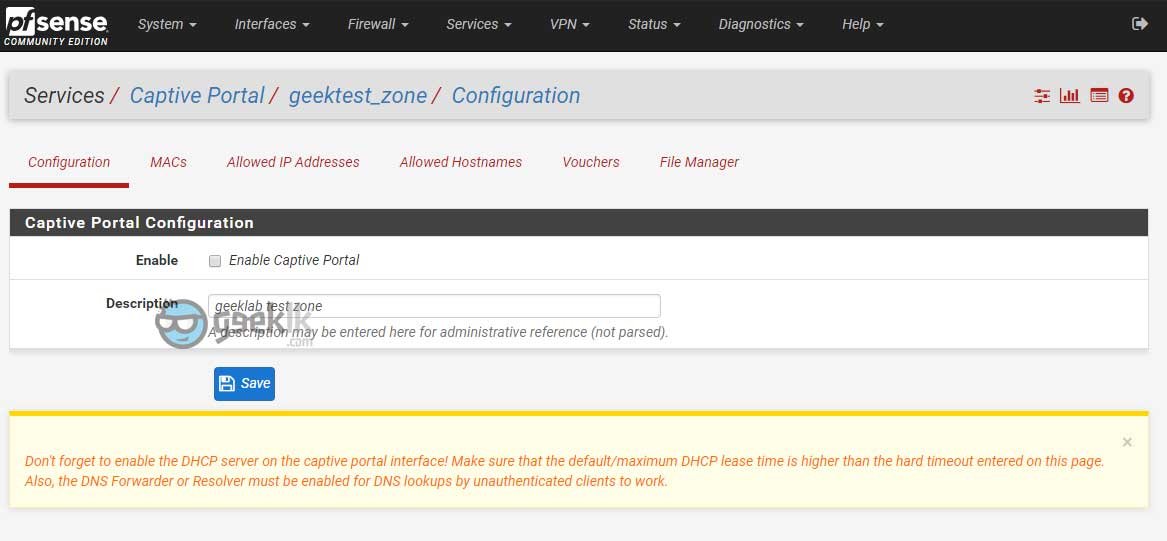
Upon selecting Enable Captive Portal, the options will expand to select and tune according our requirements. I will cover the most important settings that is required for the captive portal to function properly.
Captive portal general configuration
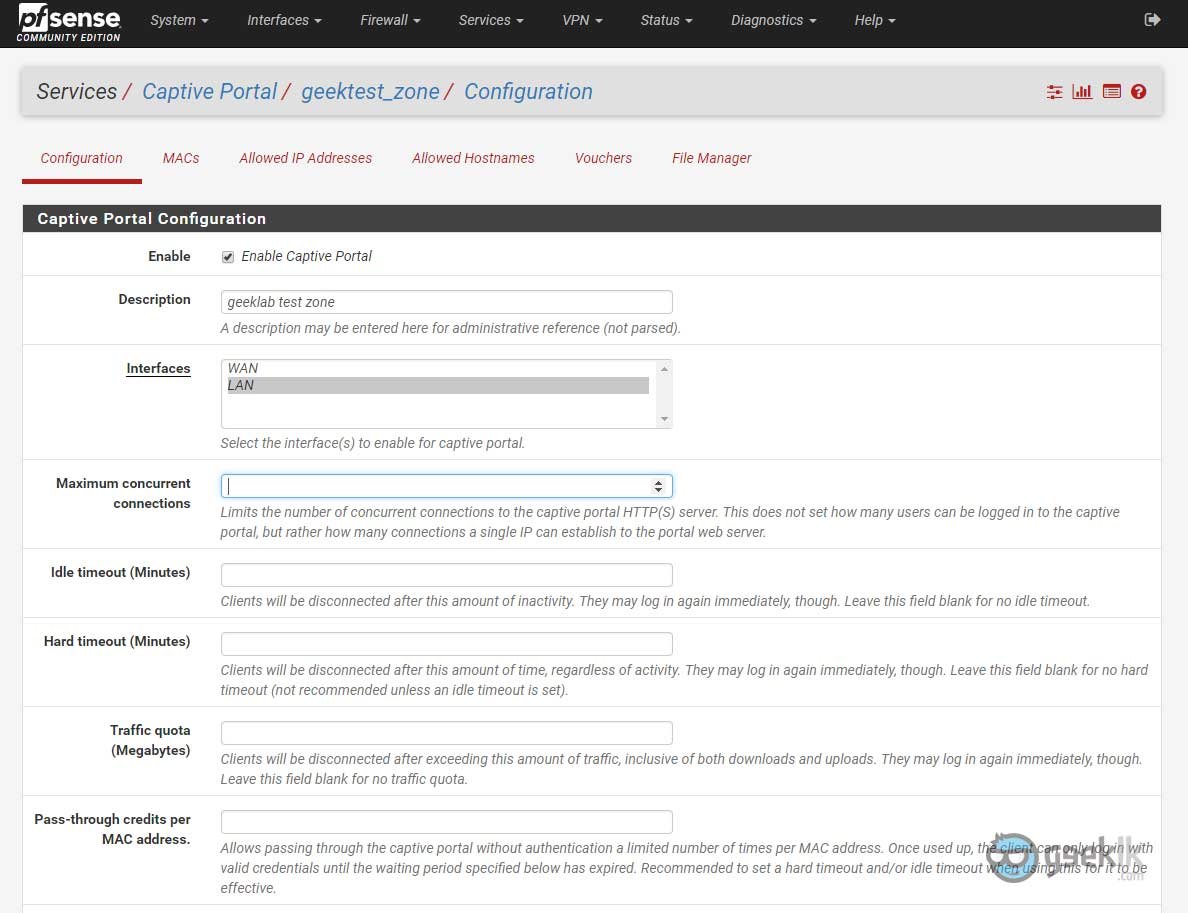
Description – Description can be kept as is or can be anything of your choice to type.
Interfaces – Absolutely an important and the whole captive portal function is depending on which interface you wanted to run on. Usually it will be on GUEST or PUBLIC related interface or most likely the same LAN interface.
Maximum concurrent connections – This option is to limit the number of users who can be able to join the given captive portal subnet. This doesn’t mean the number of users but the connections/sessions a single IP/Host can establish to the portal. Like concurrent connections in a general firewall component.
Idle timeout – Idle timeout is best when running a captive portal based on time or quota. This will ensure to timeout/disconnect the user when on idle for given minutes.
Hard timeout – This is recommended when idle time is set. This means, disconnect the user session irrespective of the idle time.
Traffic Quota – These are in Megabytes as they represent the weightage of the total DATA consumption (inclusive of upload/download). Can be used if required.

Logout popup window – A good feature to have if you’re commercializing this option to your customers. If not can be ignored. One major flaw is the blocking of pop-ups by modern web browsers.
After authentication Redirection URL – This is best to promote your business or showcase your company portfolio post successful login of captive portal users. Can be ignored if not really required.
Per-user bandwidth restriction – A good to have feature if you want to restrict bandwidth to certain level per users. Do note, this is in Kilobits as they represent speeds of the internet access. I would not recommend doing as they are other ways to achieve restrictions as well as prioritizing traffics within the pfsense.
Use custom captive portal page – A good one to use knowing you have knowledge in coding and customizing the portal of your choice. Otherwise, the default page comes handy in the new pfsense release
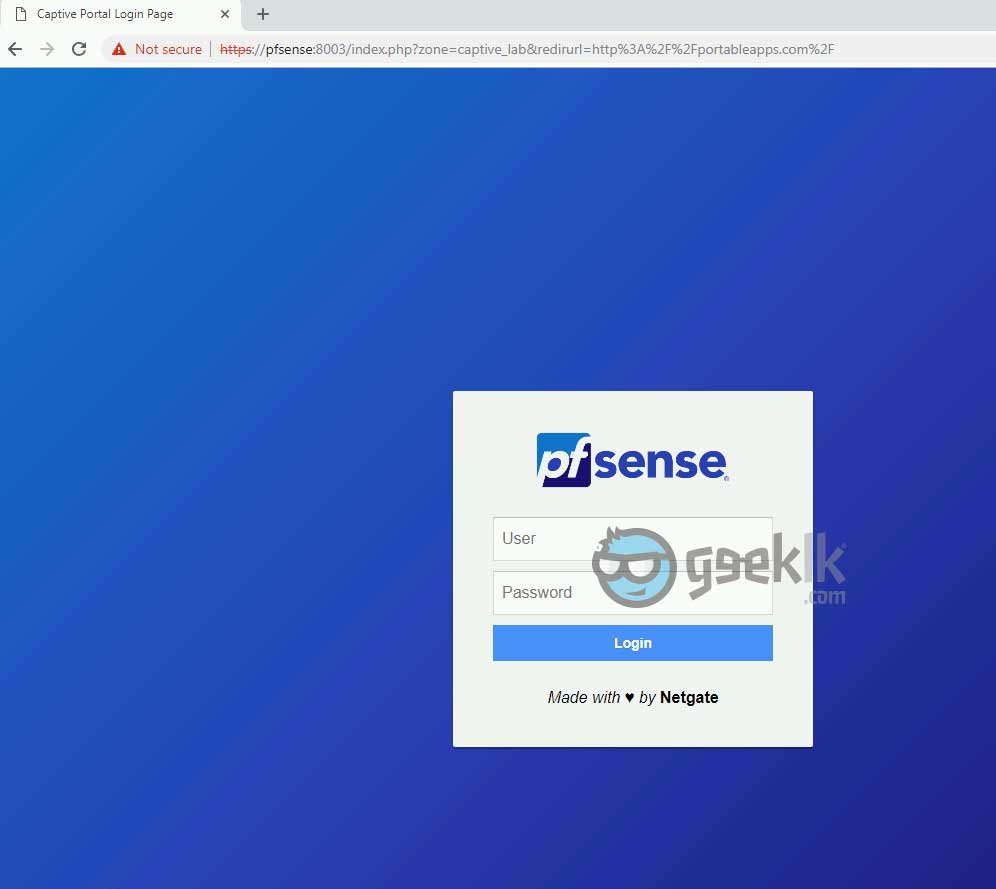
Captive Portal Login Page
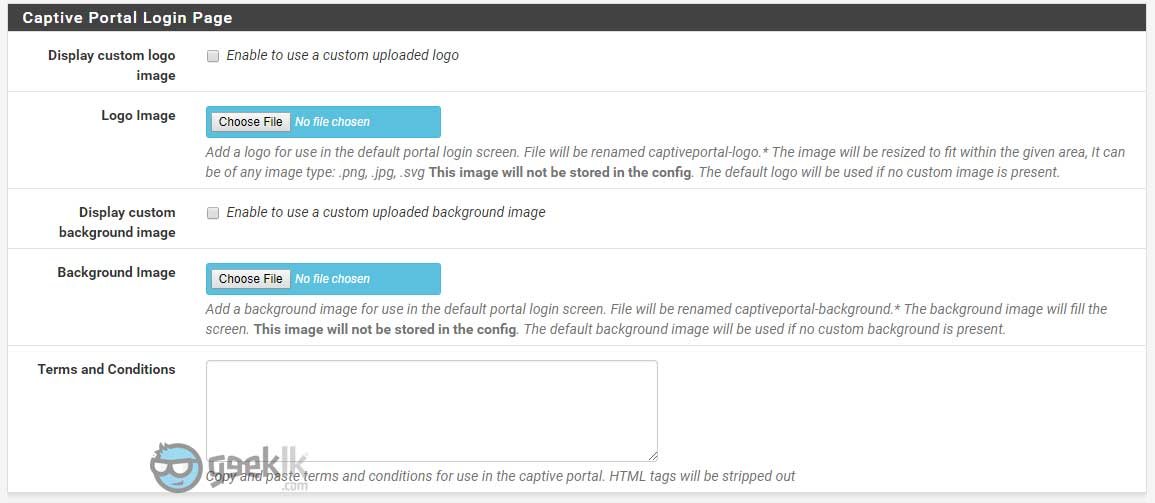
Display customer logo image – Using pfsense’s default page, you can add a customer logo of your choice.
Display custom background image – For uploading a background of your choice
Terms and Conditions – you know what it means
Authentication
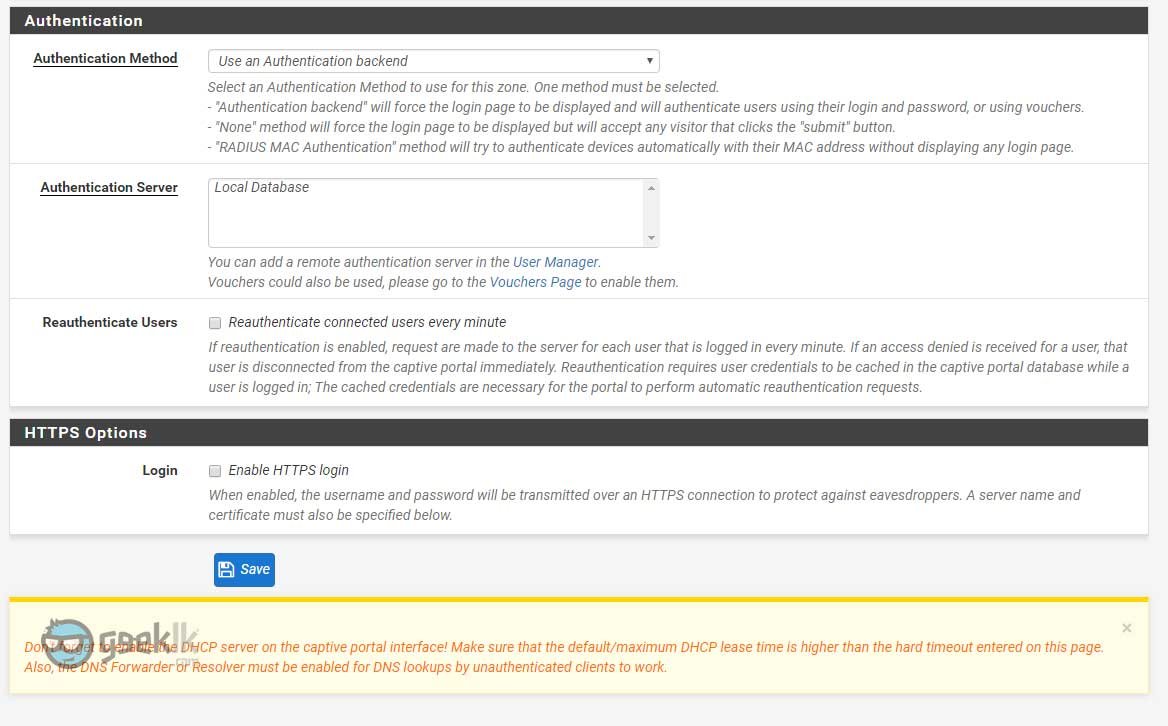
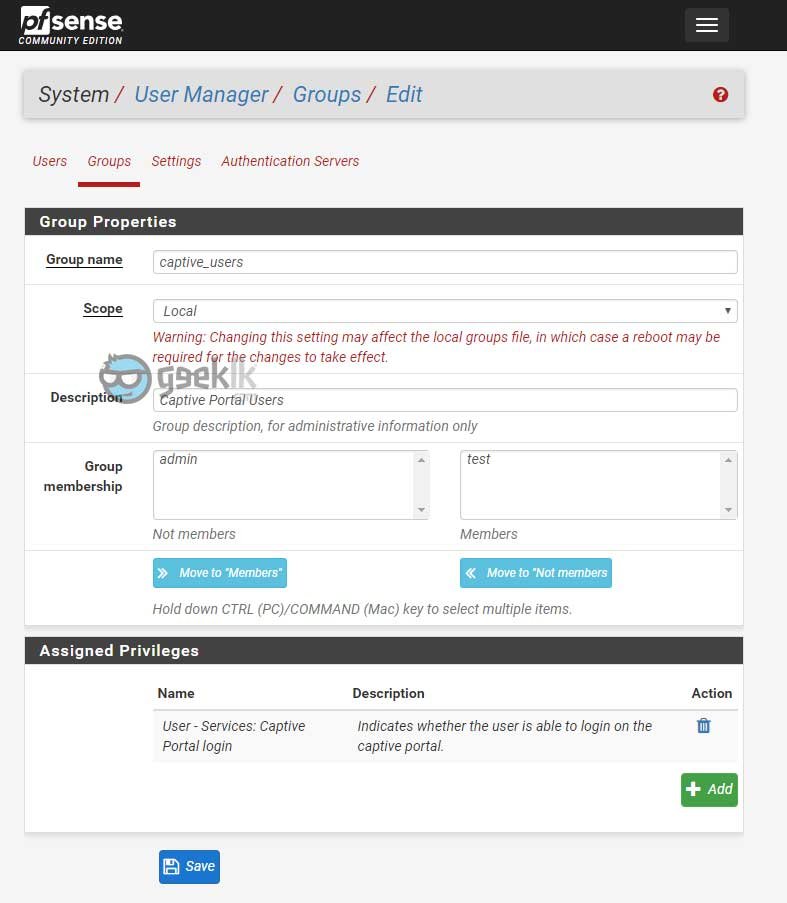
Authentication method – A better explanatory is given within the option itself. However, when using Use an Authentication backend option, be sure to either add the local users to captive portal login access or simply create a group with the privilege.
I chose to create a group with the privilege, which makes it easier and all I have to do is add the users to the group for access. To the this, click on Systems -> Users manager -> select Groups to create a group, add the users who requires captive portal access and also assign the priviledge ”User – Services: Captive Portal login” and save.
Authentication Server – Must be Local Database or you can create AD database using the user manager under Authentication servers’ option. Refer to my article on creating windows authentication for better understanding.
HTTPS options

HTTPS server name – it is ideal to simply give the firewall name with no other domain details included. This will avoid unnecessary redirects. If needed, you can add that to the pfSense’s DNS resolver or to the DNS which is handling your client queries.
SSL Certificate – This is again something unavoidable when forcing SSL. Since the certificates are not signed by valid CA’s, user’s browsers will get error but hey at least an intruder won’t be able to see what password the user is typing. This can be played around with MITM (man in the middle) attacks, however, everything is a risk. If sitting on a public, you may do so.
HTTPS Forwards – Not something that is required.
These settings will fairly get your captive portal up and running without errors. Also, I have not discussed about voucher-based authentications and RADIUS MAC authentication as it requires a bit more lab tests for me to write accurately.
GeekLK Tips
MACs, Allowed Hostnames & Allowed IP Addresses – This can be used to the users or hosts who you do not want to present the captive portal on certain URLs, IP Addresses.. etc. It allows the users simply to access said allowed traffic without captive portal prompt. This can be used for the clients as well as a white-list to avoid prompts. However, when using the client option, ensure they are on DHCP reservations to avoid another leased client misusing through the same IP. Or the best option is to add MAC addresses of such devices as they are unique to every device ever on earth.

File Manager – This is where you upload your customer login itineraries such as logo, login page, error page… etc, with a notation of “captiveportal-“ in the front.
Viber gets a brand-new look with its recent update (10.0.0)
Are you a Selfie Lover? Find out which smartphone you want to buy

An IT professional living far away from the pearl of Indian ocean. A Telecom nomad moved towards networking & hospitality IT building elegant resort in the romantic island of Maldives. An open-source fanatic, a geek and yes! a minion fan. I prefer football & popcorn ^_^
1- I want to know more about “Pass-through Mac auto-entry” option. As i have wifi and guest do login. once logged in, it should auto connect without popping up login page and retyping password again. For eg. If Password code is for one day(24hrs), and A-guest logged in and after sometime he goes out and comes back. A-guest should not get login credential to enter again, as he is already logged in and should connect automatically.
sorry for my bad english.. hope you understood.
2- Liquidsquid- in this report everything is fine. but is there any other way or option to get report with reference to MAC id or User code used?
Thank you very much in advance.