pfSense – Configure Dynamic DNS with FreeDNS
My previous articles on Configure Dynamic DNS with NoIP and Accessing the firewall with Dynamic DNS has information on allowing firewall access over internet. Have a quick read and prepare the firewall to access over WAN. pfsense is a good treat as I always say, comparing to other firewalls and is open-source. Howsoever, not all techs know everything and anything about technology, since our skills differ to each other. In manner of speaking, I got to know about FreeDNS while having a conversation with one of my management member.
When this was brought up, without a second choice, I stated No-IP since I’m using currently. What interested me was its lifespan of host-names. They are available as long as the configured host is alive and synced. While No-IP requires a validation to the created hosts every 30 days of time. I cannot be grumbled since my use is on a free No-IP account. FreeDNS, took a few minutes to figure out as their documentations weren’t so clear to me. Hence, this post is composed as a draft so that anyone could benefit out of this.
How have I configured FreeDNS
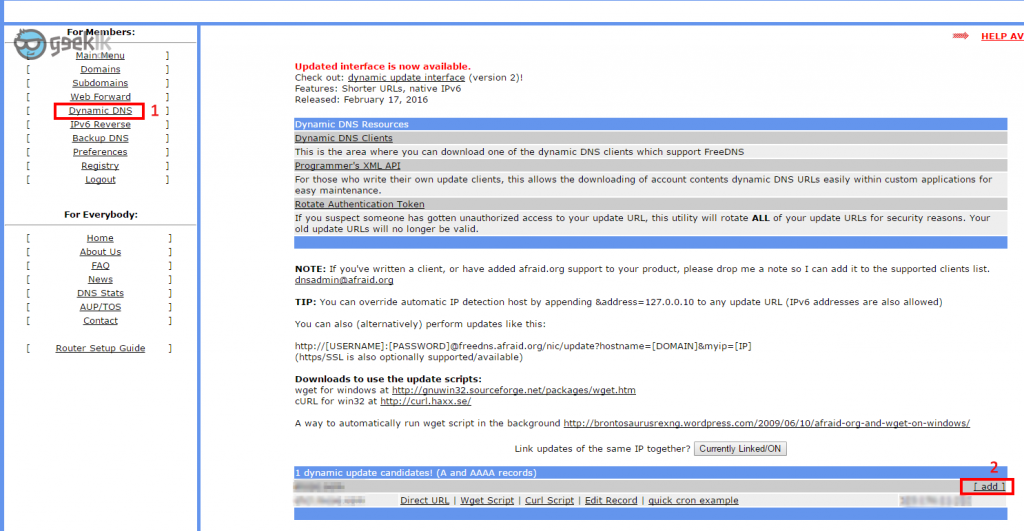
- Visit FreeDNS and select sub-domains or dynamic DNS which will take you through sign-in, or simply create an account.
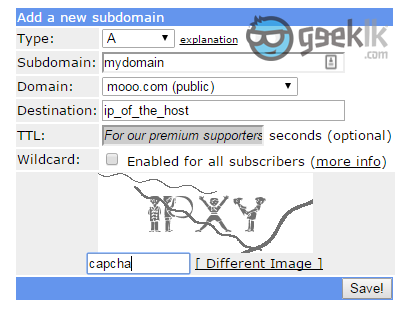
- I have created an account as well as the sub-domain. Either of the said selection will take you to the same window as seen below. So, proceed adding your subdomain;
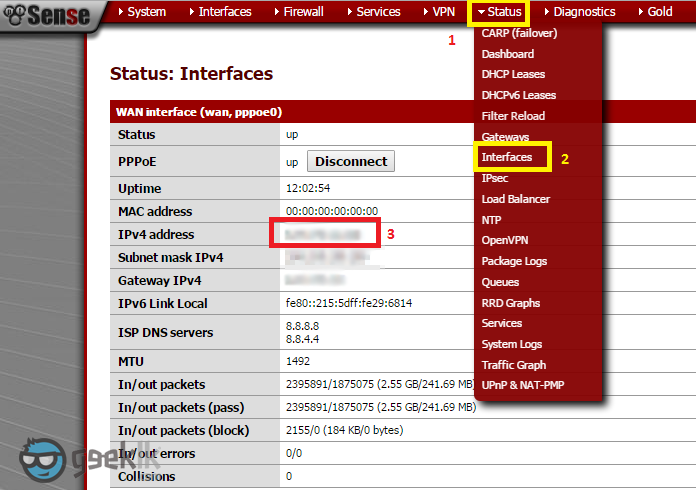
- This needs to be an “A” record since we are pointing out the IP of the system we tend to use. Select any domains they have listed and type-in your subdomain. Destination has to be the Dynamic IP address of the host you’re intended to use. This can be obtained from your pfsense firewall, under WAN interface (refer below image). Proceed to save once done.
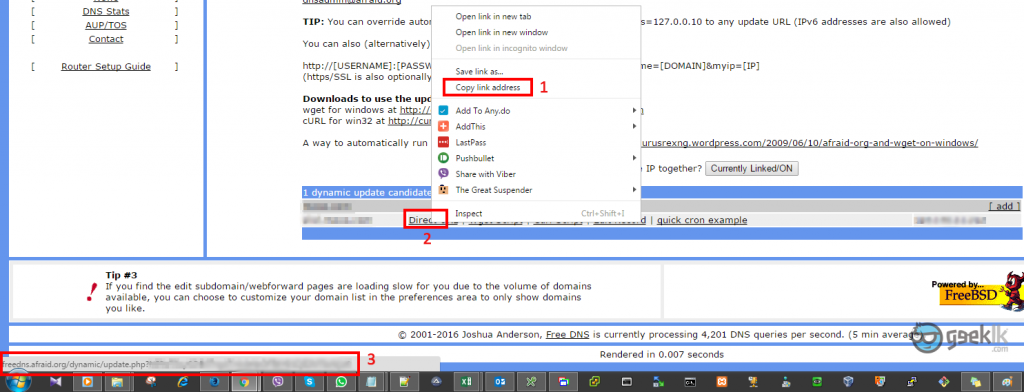
- Once saved, proceed to dynamic DNS and you’ll see below. When you hover mouse, you’ll see a unique identifier (seen in #3) after “.php?unique-identifier” before “==”. I could only see the identifier but no equation signs after. Nevertheless, right click on direct link (shown on #2), and copy the link. On the copied link, simply select the unique identifier. This is what we will require to configure
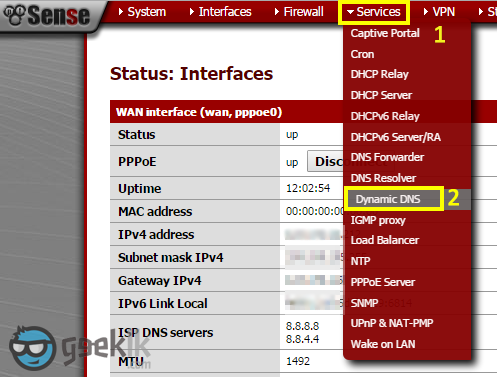
- Now log in to the pfsense and navigate to Dynamic DNS.
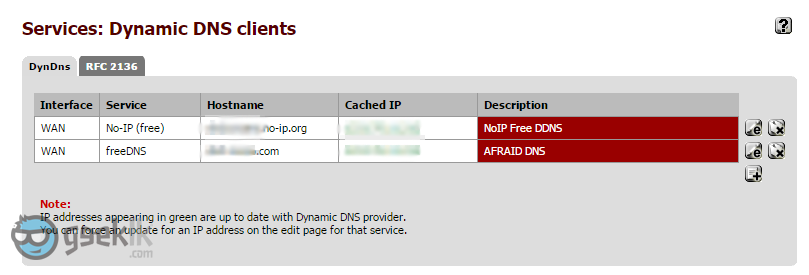
- Below is the Dynamic DNS overview. Ignore what is created as you see. Both my No-IP and FreeDNS is working like a charm. I’m able to resolve with both the hostnames and also VPN-in to the network without a hassle.
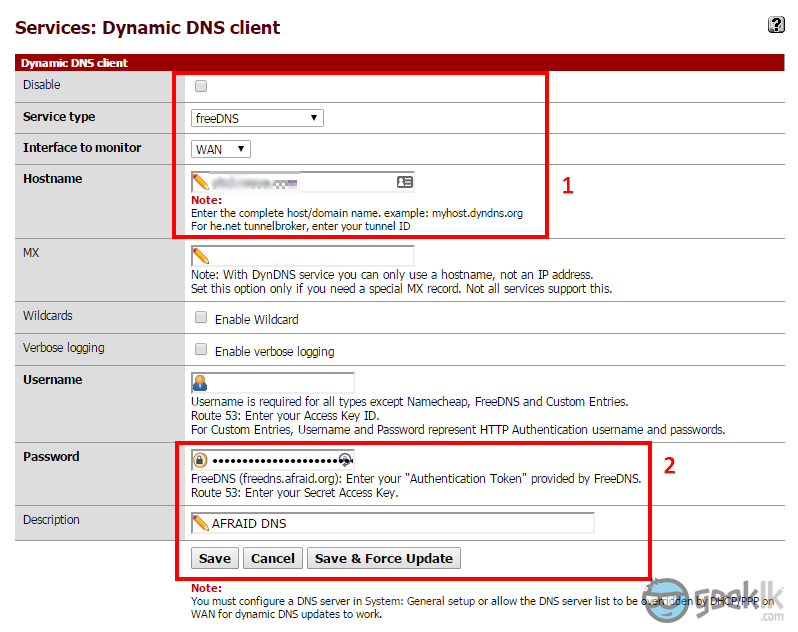
- Filling information is pretty straight forward except for the part that I will have to explain. So to start-off with, select the type as “FreeDNS”, interface is WAN (of course), then the created hostname (a.k.a subdomain) from FreeDNS. Then moved to #2, and paste the Unique Identifier you have copied earlier to the password box. No, we don’t require account authentication in the way as No-IP, not even the username of the account. Description is up to you. Select “Save & Force Update” to be on the safe side.
- Allow few mins to propagate the changes over the globe (I believe). Firewall should be accessible over the WAN assuming rules are in place (refer beginning of this post).

