pfSense – Installing and setting up VPN with OpenVPN
pfSense is one of the best open source and FreeBSD based firewall available at present. It use to be a software firewall which now available as a hardware appliance as with support. Most of the default features offered are basically premium features with other software based firewalls. As I have promised, this post will explain how to install and set-up OpenVPN to use your pfSense router for VPN access. Refer to my old posts on pfsense where I have discussed various features and configurations.
pfSense offers two kinds of VPN services, which are L2TP/IPSec and OpenVPN in order. L2TP is an unencrypted/insecure tunneling protocol which uses IPSec transport mode to secure the channel. Not much of a fan nor do I encourage using them. Instead, I would strongly suggest using OpenVPN as it has major support with cross-platform as well as its performance compared to the rest. I have tested this with a 2Mbps ADSL connection from another 2Mbps coaxial connection between two different ISPs and the performance is flawless.
Setting-up OpenVPN on pfSense
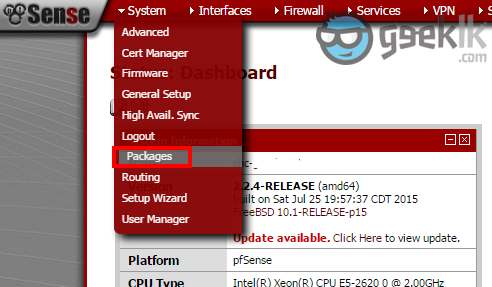
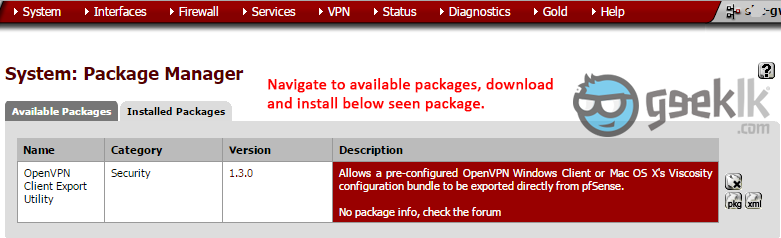
- Login to pfsense -> select packages -> search and install “OpenVPN Client Export Utility”. Although this is not the first part, we will require the package to be installed and used at later point. But let’s keep it ready to be used.
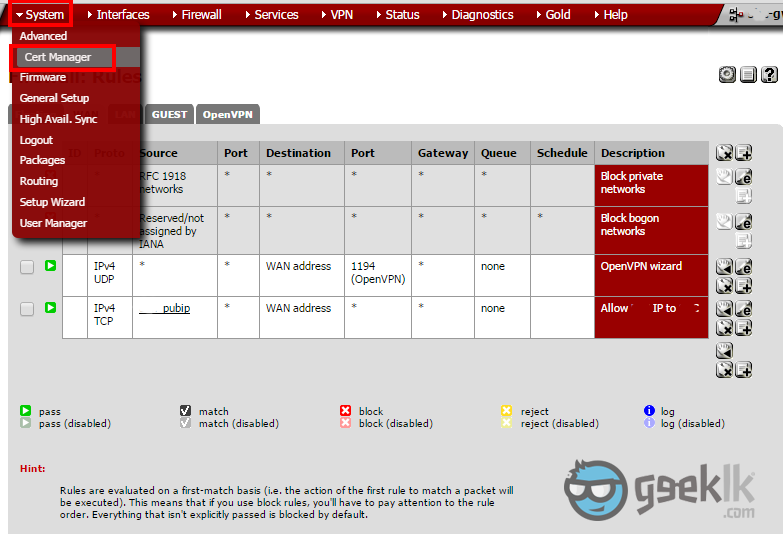
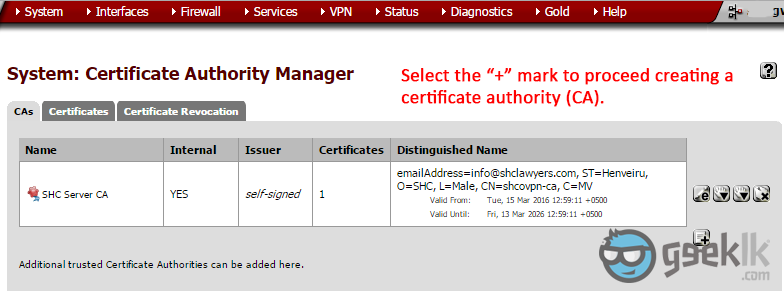
- Once package installation is done, Navigate to “System” and on the drop-down menu, select “Cert Manager“. As seen above, select the “+” mark to proceed with the CA.
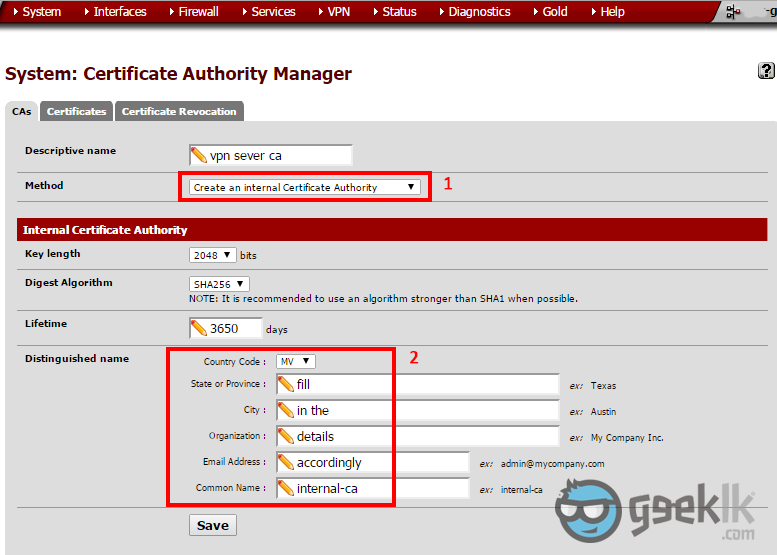
- Select to create as seen on 1, and then fill in the cert information. These are basic information which I don’t explain in detail. However, if you have any concerns, please comment and I shall reply. In order to access VPN, you’ll need user certificates and an authority to issue certificates for VPN tunnel. This is where they are created.
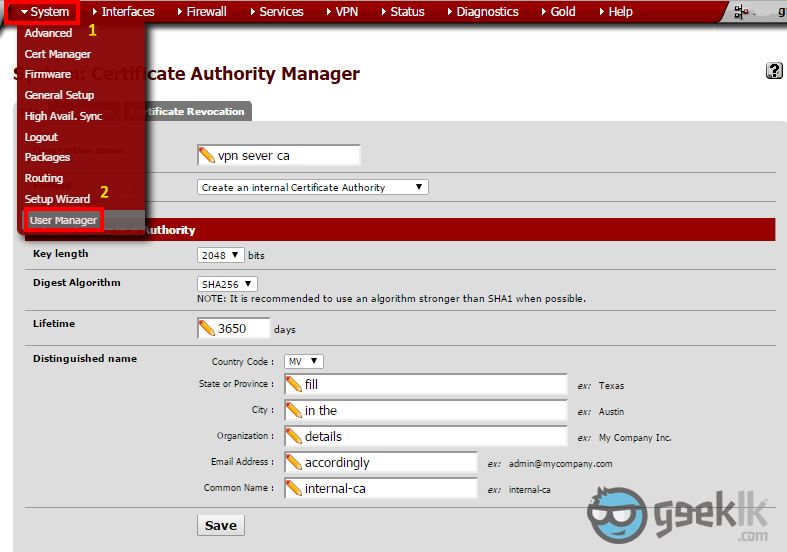
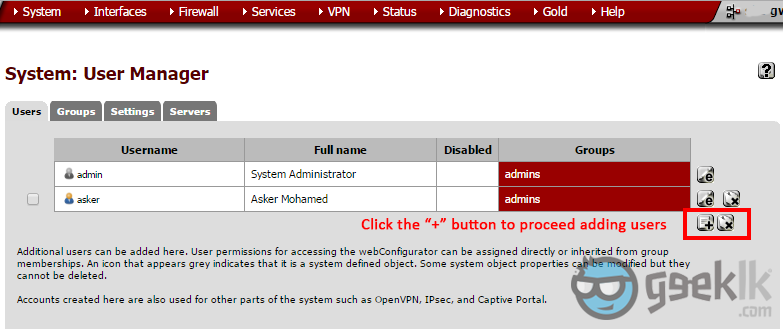
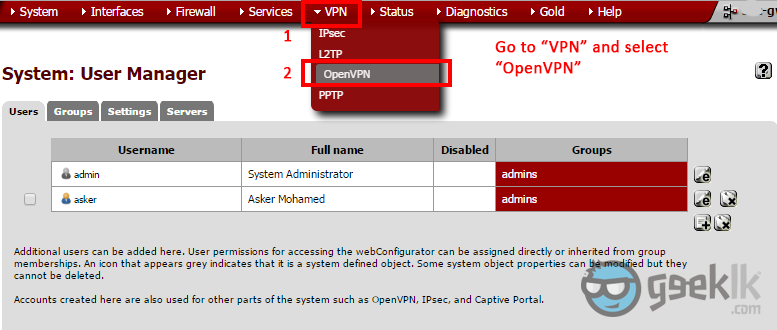
- Once CA creation is done. Navigate to “User Manager” as seen above in 1 & 2. Then create a user.
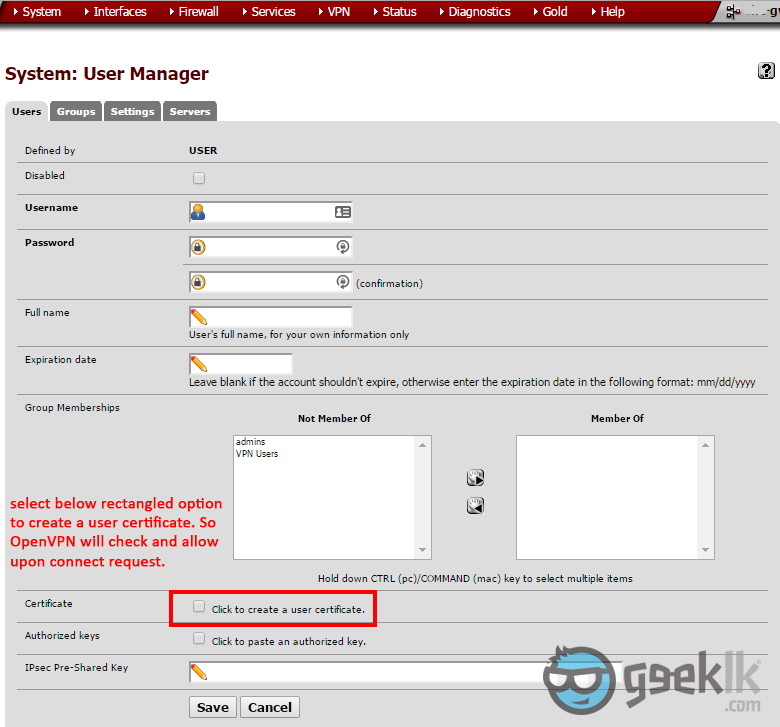
- Fill in the details for the user creation and select to create a certificate at the same time which will be used to communicate with the VPN service.

- When creating user and the certificate, select the CA as the one we have created earlier through the Cert manager. Once done, save it; which will create the user cert.
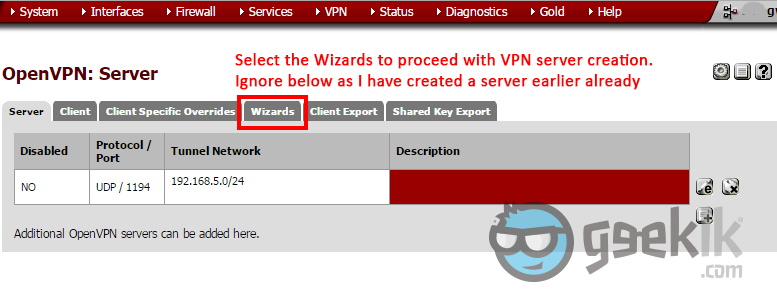
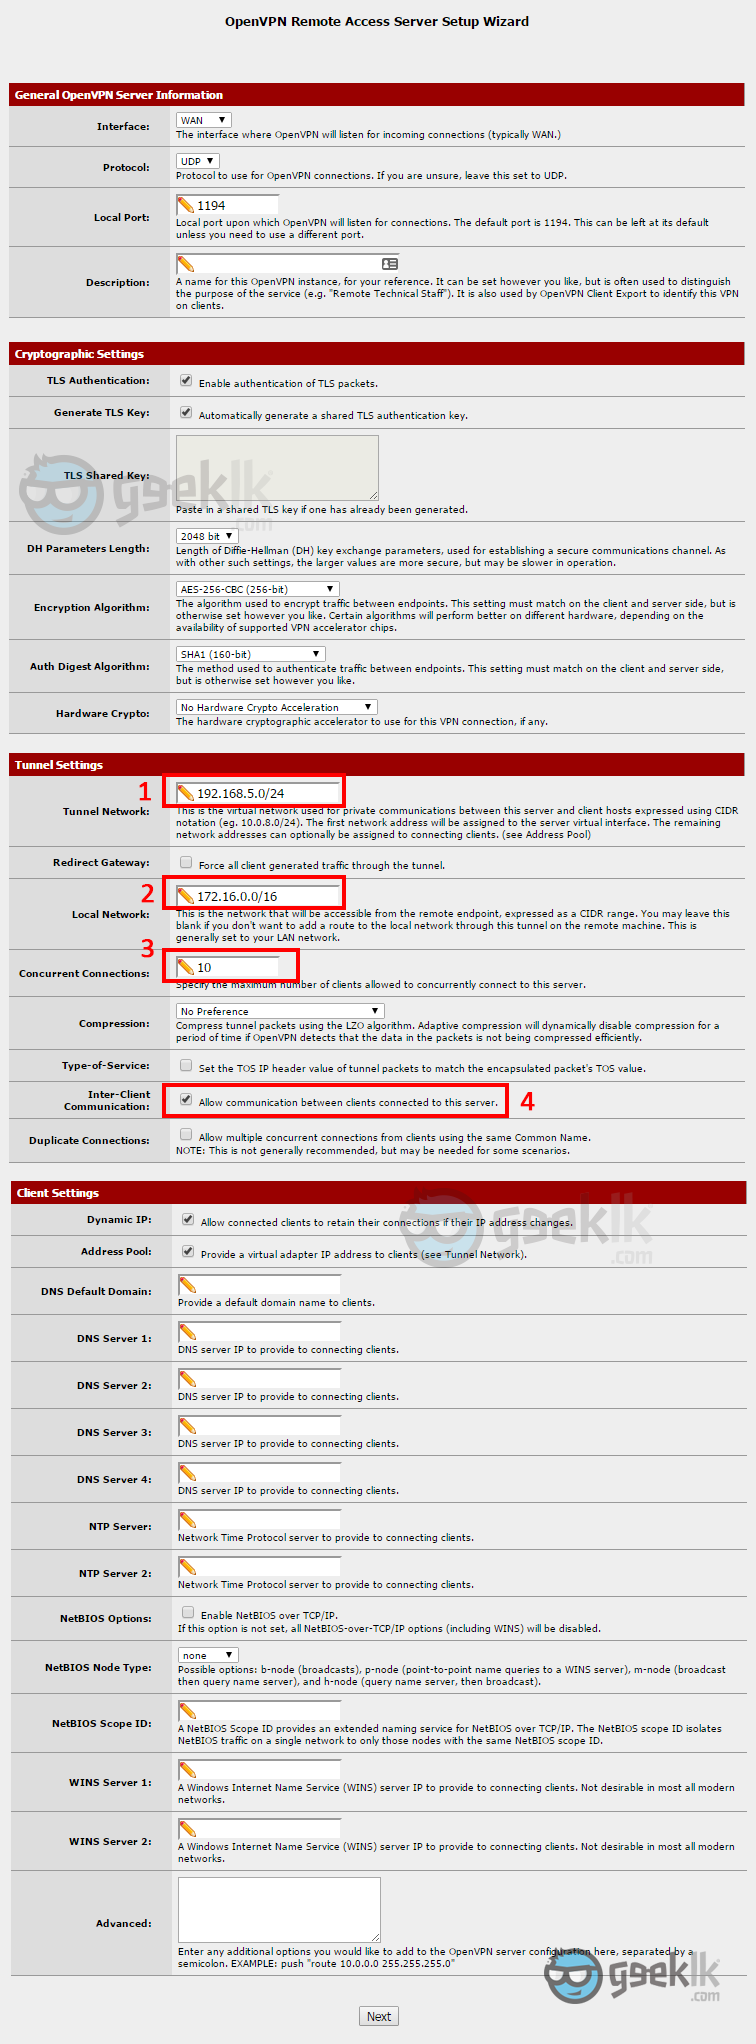
- Once the user creation is done, proceed to OpenVPN with the top navigation menu as seen above. And then on the OpenVPN overview, select wizard which will take you through a series of configuration requesting for the required information. Ignore the server seen above as I have created one, already.

- Select the User authentication method. If you’re using the pfsense created users, you can proceed with local user access or select the other methods such as active directory if you have configured. If you require AD authentication method, please refer to this post of mine.
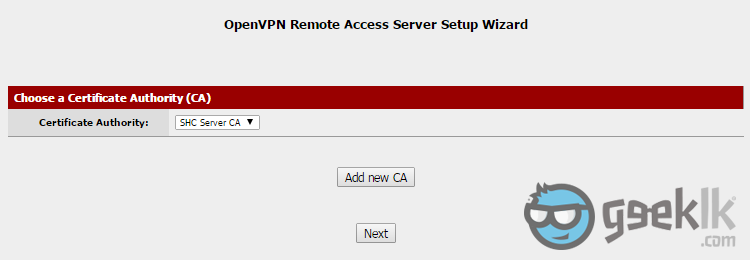
- Select the CA which we have created (already selected as seen), and proceed with next.
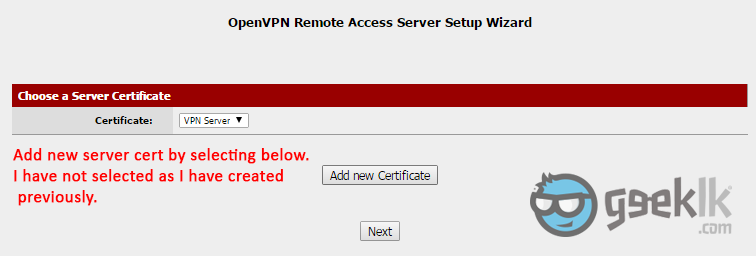
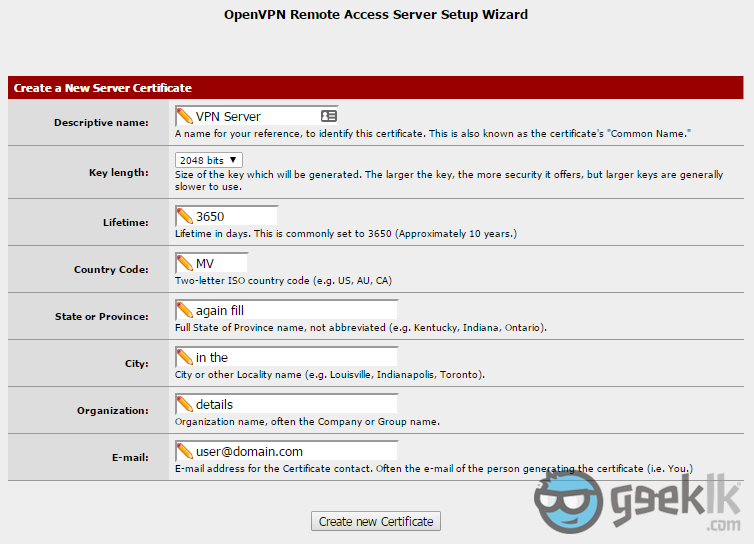
- You’ll need to create a VPN server certificate to connect to the tunnel using the CA. Here you’ll create a certificate by selecting “Add new Certificate” and proceed creating similar to what you did above with CA creation (sample shown below), then proceed to next.
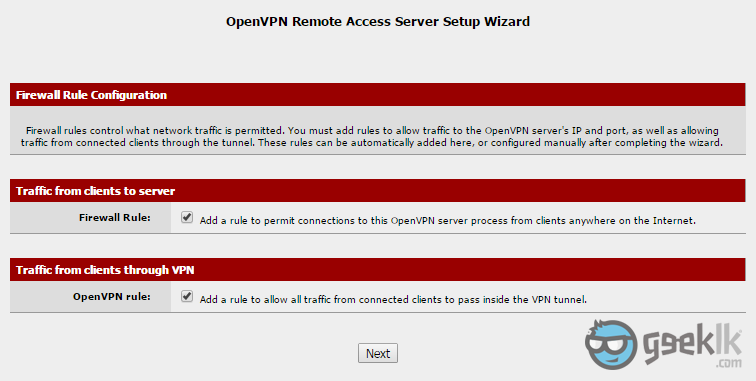
- Leave the ticked and proceed to next as they’ll take the responsibility of adding the rules on the interfaces for you. So, you could simply VPN in.
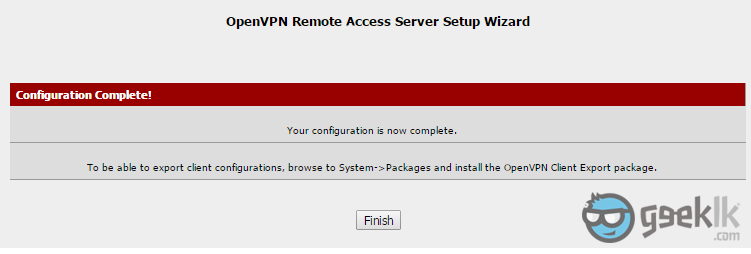
- Finish the configuration.
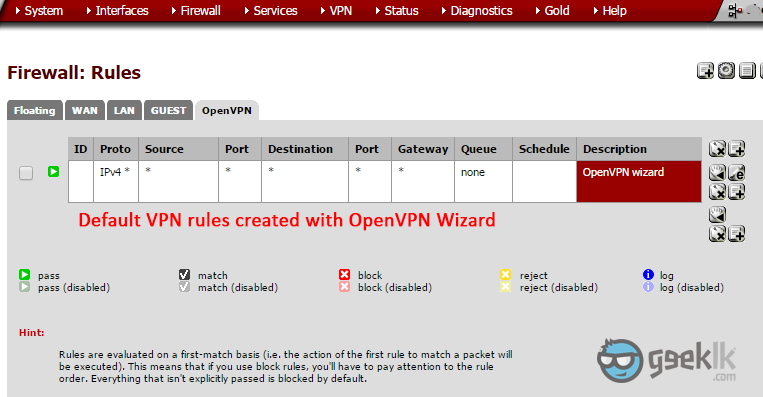
Overview of the Rules on Interfaces (For your view)
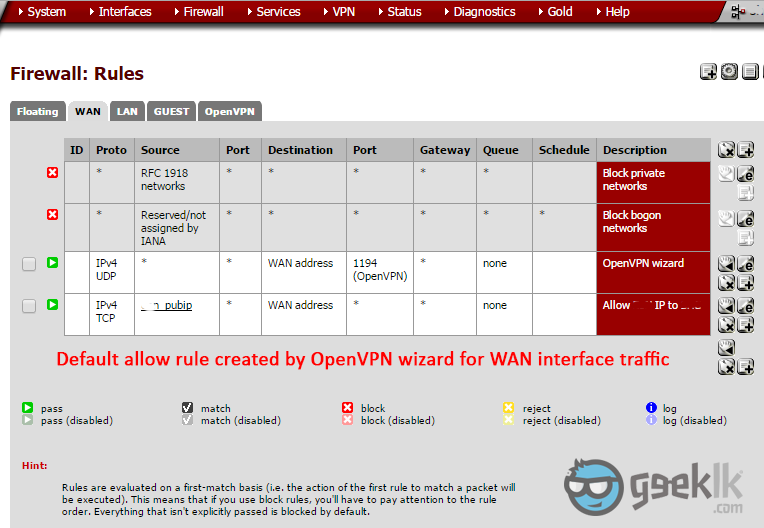
As seen above, configure your LAN by editing the OpenVPN server configuration to match your LAN subnet. Regardless of the configuration, VPN tunnel should see the LAN subnet as the LAN devices are talking to pfsense as the gateway, if not a static or a routing is required.
Once all is set-up. Navigate to “Client Export” shown above. This is where the package, we have download at the very beginning. Under client export, you should see the VPN client export packages with various options. Download the required one and start using it. I shall capture configuring OpenVPN and using the export package on another post sooner.
Any other question, please put it in the comments and I will try my best to explain, resolve.
Xiaomi Redmi Note 3 – Contacts issue with WhatsApp
GeekLK’s useful Chrome Extensions [Part 1]

An IT professional living far away from the pearl of Indian ocean. A Telecom nomad moved towards networking & hospitality IT building elegant resort in the romantic island of Maldives. An open-source fanatic, a geek and yes! a minion fan. I prefer football & popcorn ^_^